Showing posts with label Snacks. Show all posts

Thursday, November 3, 2016

Jalebi / Jhangri

While I may not be sweet-toothed, I am surrounded by many who are and times I too feel like treating my sweet taste budz. This diwali, I chose to make Jalebis - those yellow, thin, crispy ones. And then there are those Jangris - those orange, bit thicker, softer ones. 

Jalebis are made using all purpose flour, will have a slight tangy taste, and the flour is fermented overnight before preparation. Jangris are made using uradh dhal and fried gram dhal flour, and is neither tangy nor fermented.

Wonder why I started with mentioning both that's because my dish was a hybrid of both named as "JalJangebis" ;)

I used Uradh Dhal and rice flour - ideally output should have been jangri. But given the shape, color and crispiness it was like jalebis -- end of it all, this hybrid sweet "jaljangebis" was also a roaring success :)

Ingredients:

  • Uradh dal - 2 cups
  • Raw Rice - 1/4 cup
  • Sugar - 500 gms (as per your taste you can add or reduce this)
  • Oil - To Fry
  • Lemon yellow - 1/2 tspn food color (this will give the light yellowish orangish shade) 
  • Saffron - some use this 

Method

To make the flour:

  1. Soak uradh dal and raw rice for an hour. Grind both separately to a smooth batter till they become frothy. Consistency should be that of dosa flour
  2. Mix them and allow it to rest for 30 mts
To make the sugar syrup:
  1. In a non stick pan, add sugar and 1-1.5 cups of water. Cook it on medium flame
  2. Add 2 tspn of milk to remove any froth due to sugar (you can remove the froth as it floats up)
  3. The sugar syrup starts condensing and should be One String. Switch off the flame.
  4. Add a lemon wedge to retain the consistency of the sugar syrup and disable any crystalization later.
  5. Sugar Syrup should be left on the gas to retain the heat 
To make the jaljangebis / jangris:
  1. In a kadai, heat oil. You can test the readiness by dropping a small ball of the batter inside. It should pop up immediately.
  2. Fill the jalebi maker with the batter. Alternatively, you can use a cloth or a milk cover with a small hole on one of its corner and make them.
  3. Make the desired shape... jangris and jalebis differ in shape but whichever comes easier for you go for it
  4. Allow it to fry to golden brown on both sides by turning them
  5. Remove from fire ensuring no excess oil and dip it directly into the sugar syrup. Ensure sugar syrup is warm to hot when you dip it
  6. Allow it to stay each side for 1.5 mts and remove it to a vessel (overall 3 mts).
  7. As it cools down, you can pack it in air-tight container.

Wednesday, November 2, 2016

Pottukadalai / Gram Flour Muruku

Muruku, a very popular south indian snack, is the one that comes in various shapes, flavor, tastes and sizes. One of the most easily customizable snack it is.

Typically in mixtures, we find the famous 'oma podi' variety added. But, I chose to make Gram Flour muruku but as thin as oma podi.


Ingredients

  • Gram Flour / Pottukadalai maavu    - 3/4 cup (made out of fresh fried gram dhal /pottukadalai)
  • Rice Flour                                         - 1.5 cups (I used ready made rice flour)
  • Uradh dhal / muzhu uzhundu **      - 1/2 cup 
  • Cumin Seeds                                     - 1 tspn
  • Melted ghee / butter                          - 2 tbspn
  • Salt                                                    - to taste
  • Asafoetida/ Hing                              - a pinch
  • Oil                                                     - To fry
Method:
  1. In a kadai, dry fry uradh dhal to light brown color. Remove to a plate to cool
  2. In the same kadai, dry fry the gram dhal till golden color. Remove to a plate to cool
  3. Powder them separately and sieve them.
  4. Sieve the rice flour. 
  5. Mix all three flours together. To this, add salt and cumin, and the melted butter / ghee/ oil. Mix it well to ensure no lumps. Use water to knead it to a dough like you make for rotis (should be neither very hard nor watery)
  6. Cover it with a wet cloth and allow it to rest for 15 mts
  7. In a kadai, add oil and allow it to heat up. On a medium flame make the murukus. 
To make the muruku, we use muruku maker or the idiyapam maker. This comes with multiple plates with different types of holes, which will decide the thickness of the muruku when squeezed. Choose the plate based on the thickness you desire. For mixture, we will make them thinner.
 

NOTE: 
  • ** I used uradh dal this time but we can make this muruku without uradh dal. 
  • I made mixture in two batches. For one of it, I made muruku using besan / kadalai maavu. On the second day, I made this pottukadalai version as this is more healthier. 
  • Recipe courtesy are those blogs that I walk into, thanks to Google Search :) Tx to all those bloggers from whom I learn virtually. Ofcourse, I customize it to a great extent but still thanks for sharing your preparations.

Tuesday, November 1, 2016

Kaara Boondi

Kaara Boondi is one of those tempting snacks that you might end up munching more than intended! This diwali, I prepared this at home as an ingredient for South Indian Mixture (Click the link for mixture recipe)


Ingredients:

  • Besan / Gram Flour / Kadalai maavu    : 1 cup
  • Rice Flour / Arisi maavu                       : 1/2 cup
  • Baking Powder                                      : 1 tspn
  • Pepper or Red Chilli powder                 : 1-2 tspn
  • Salt                                                         : To taste
Note: I made this as an ingredient for Mixture. This can also be a standalone snack. If so, you can add fried cashew nuts, dried grapes, curry leaves etc.

Method:
  1. In a bowl, mix gram and rice flour with salt, red chilli / pepper powder and baking powder. Some add asafoetida as well. (sieve the flours if needed)
  2. To this mix, add 2 tbspn water and beat it well to make it a smooth dough with no lumps. Then add more water to get a pouring consistency (like dosa batter)
  3. In a kadai, heat oil for frying. As it heats up, using the a ladle with holes (as shown in the image), we will make the boondis. 
Ladle with holes

Hold the ladle with holes on top of the kadai, and add a serving spoon full of batter to it. Keep moving the ladle in a circular manner to ensure no lumps of boondis are formed. You can use the serving spoon to spread the batter on the ladle as you keep moving the ladle.

Remove the boondis as they turn golden yellow or slightly brown to a plate/vessel with tissue paper. This can be cooled and added for the mixture. If you plan to consume it as a snack, you will need to garnish it with fried cashew, dried grapes (optional), and curry leaves (fried and broken)

South Indian Mixture


Snacks is such an integral part of our life, ain't it? Varieties galore and each place in India comes with its own specialty dish.

This diwali was my maiden attempts at making these snacks. I began with making South Indian Mixture, Muruku, Boondi, and Jilebi.


With my test buddies keen to be tested, I began my attempts with Mixture first. As the name indicates, this is a snack which is an apt mix of different individual snack items.

Ingredients:
  1. Kaara Boondi - made separately                              -  1-1.5 cups
  2. Crushed Omapodi / muruku - made separately        - 1-2 cups (broken)
  3. Peanuts                                                                      - 1/4 cup
  4. Fried Gram Dhal                                                       - 1/4 cup
  5. Rice Flakes / Poha                                                    - 1/4 cup
  6. Cashew Nuts                                                             - 10
  7. Dried Grapes                                                             - 10
  8. Curry Leaves                                                             - handful
  9. Red Chilli Powder                                                    - 1 tspn
  10. Salt                                                                            - to taste (I added 1/4-1/2 tspn only)
  11. Hing                                                                           - 1/4 tspn 
  12. Oil                                                                              - To fry
  13. Ghee                                                                           - 1 tbspn (for flavor, optional)
Method:
  1. Make Kara Boondi and Oma podi / Muruku separately. Recipes for those are shared as separate posts.
  2. In a deep pan, add oil to deep-fry ingredients. As it heats up, begin with frying peanuts, fried gram dhal and rice flakes separately. Fry them till they become golden brown (peanuts will crack). Ensure none of it are over-fried / burned
  3. Following these three, fry cashwe and dried grapes
  4. Finally, add the curry leaves 
  5. In a large vessel, add salt, chilli powder, and hing. To this, add all other fried ingredients
  6. Close with a lid and mix them by tossing
  7. Allow it to cool and store it in an air-tight container
Note
  1. Ensure salt is very minimal as each ingredient like muruku and boondi also are salted
  2. In addition to the above-mentioned ingredients, you can choose to add any other snacks such as maida/wheat biscuits, kara sev, thattai, fried channa dal etc

Monday, September 26, 2016

Veg Stuffed Paneer / Cottage Cheese

Paneer (Cottage Cheese) is so flexi that you can make variety of dishes using it. Wanted to try my hand in making some stuffed paneer... after a quick look around (thanks to 'n' number of cookery blogs, sites, videos), I zeroed in on making a Vegetable Stuffed Paneer starter dish.


Ingredients:

  • Cottage Cheese / Paneer : 150-200 gms 
  • Cumin Seeds                   : 1/2 tspn
  • Ginger Garlic Paste         : 1 tbspn
  • Green Chillies                 :1-2 finely chopped (instead you can add more of red chili powder)
  • Onion                              : 1 big finely chopped
  • Capsicum                        : 1 small finely chopped
  • Potato                              : 1 medium boiled and mashed
  • Butter / oil                       : 1 tbspn
  • Turmeric Powder             : 1 tspn
  • Red Chili Powder            : 1/2 - 1 tspn
  • Salt                                  :  To taste
  • Cashew                            : 4 finely chopped and fried
  • Garam / Curry Masala     : 1 tbspn
  • Coriander Leaves
  • Corn Flour                       : 2 tbspn
  • Breadcrumbs                    : to coat
  • Oil                                     : to shallow fry
Method:
  1. Cut the cottage cheese into thin block of squares (like Cheese Sheet). Sprinkle each sheet with some salt and pepper, and allow it to marinate 
  2. In a kadai, add butter / oil. As it heats up, add jeera and allow it to splutter.
  3. Add ginger garlic paste and saute till it cooks
  4. Add green chili and saute it for a second
  5. Add onion and saute till they turn pink (translucent)
  6. Add capsicum and saute
  7. As they cook, add turmeric powder, chili powder, garam masala and salt 
  8. Then add mashed potato and coriander leaves
  9. To this mix, add the fried cashew nuts and remove from fire
  10. Make a mix of corn flour with water. Have a plate with breadcrumbs to coat
  11. Now, take one sheet of paneer and place the vegetable stuff prepared and cover it with another sheet. 
  12. Cut this bigger sandwiched cheese sheets into triangles or halves
  13. Dip each square / triangle into corn mix followed by breadcrumbs. Repeat this process twice to give a thicker coat
  14. Shallow Fry each piece and serve hot with green chutney, or any other preferred sauce
You can use your choice of vegetables for this stuffing including carrot, beans, etc.

Salt and Spicy Sankarapara

Everything in life can become mundane unless we break the monotony and bring in some change. It's upto us what we make of our life, including every facet of our life.

Same is true for cooking... While the ingredients may seem finite (not really though!), it's us who can give the same ingredients a different form and taste. These thoughts have been lingering on and whenever it bangs me real hard, I end up trying something that I haven't till then.

This week end was a mini foodie week end! I cooked different stuff across breakfast, lunch, tea and dinner time.

It began with preparing a tea-time snack, salt and spicy "Sankarapara", which is like a mattri. This goes well with a hot cup of tea / coffee.


Ingredients:

  • All purpose flour(maida)  : 1/2 cup 
  • Semolina (Rava)                 : 1 tbspn
  • Rice flour                             : 1/4 cup
  • Chili Powder                       : 3/4 tspn
  • Salt                                        : To taste
  • Sugar                                    : 1/2 - 3/4 tspn 
  • Ghee                                     : 2 tbspn (hot)
  • Water                                   : To knead
  • Oil                                         : To fry
Method:

  1. In a bowl, mix maida, rice flour, rava, chili powder, salt, sugar. To this, add hot ghee and mix well.
  2. Using needed water, knead the dough (consistency like that for roti / puris)
  3. Leave it covered for 30 mts with a moist cloth
  4. Roll it into thin discs, like rotis, and cut them into shapes needed (diamond in this case)
  5. In a kadai, add oil and heat it. Deep fry the cut pieces till they turn brown (Take care not to deep fry them, like it happened to me for a few pieces)
  6. Place it in a tissue to remove excess oil. As they cool down, store them in an air-tight container
Note:
  • Use of hot ghee is to give them the crispiness
  • You can replace all purpose flour with Wheat flour 
  • You can make it a sweet snack by only adding sugar or jaggery


Tuesday, January 13, 2015

Vada Pav : Indian Veg Burger

Vada Pav originated in the state of Maharashtra, India, but now is a staple food for many across... A simple yet most tasty dish that can be cooked in a few minutes. For many it serves as the breakfast, lunch and dinner along with a hot cup of tea!

It is almost similar to a burger, just that this is made out of simple and easily available pav (buns, small breads) with a Vada (potato based stuffing) in between along with some spicy and tangy green chutney accompanied by some green chili and spicy garlic chutney / powder.

After tasting at a few places, I always wanted to try my hands at it. Finally, my first attempt at making Vada Pav is a reality and a complete success with my dearies :)

Ingredients:


To prepare the Vada / Tikki:


  • Potato                    :2 medium boiled and smashed 
  • Green Chillies       : 2 crushed
  • Garlic                    : 1 tablespoon crushed 
  • Ginger                   : 1 tablespoon crushed
  • Mustard Seeds      : 1 tspn
  • Curry Leaves        :  a few
  • Turmeric Powder  : 1/2 tspn
  • Coriander Leaves  : 2 tbspn finely chopped 
  • Salt                        : To Taste
  • Oil                         : 1 tbspn
  • Asafoetida             : a pinch
To prepare the Flour / Batter for Vada:
  • Gram Flour / Besan : 3/4 cup
  • Turmeric Powder     : 1/2 tspn
  • Baking Soda             : a pinch
  • Salt                           : to taste
  • Oil                            : to fry

To prepare the Chutneys:

Green Chutney:

  • Coriander leaves : a bunch (as much qty as you need)
  • Mint leaves           : a bunch (I take it in almost equal qty)
  • Green Chilies       : 4-6 (as spicy as you need it)
  • Sour Curd            : 1/2 cup (to make the chutney tangy)
  • Mango Powder    : 1 tbspn (optional; if used accordingly quantify the curd)
  • Salt                        : To taste 

Red Coconut Garlic Chutney: 

  • Coconut                      : 1 cup
  • Garlic                          : 6-8 cloves
  • Red Chili Powder        : 1 tbspn (as spicy as you like)
  • Sesame Seeds (white)  : 1 tspn 
  • Lemon Juice                : 1 tbspn

Method:

To make the Vadas:
  • In a bowl, mix the mashed potatoes with chilies, ginger and garlic
  • In a pan, heat the tbspn of oil and add mustard seeds. As they crackle, add curry leaves, asafoetida, and turmeric powder. Remove from fire immediately and pour it to the mashed potato mix. 
  • To this, add the remaining ingredients including salt and mix. Make small round vadas and leave them aside for some time
To fry:

  • In a bowl, mix the gram flour, turmeric powder, baking soda, salt and beat it to make a nice batter (consistency similar to making dosas)
  • In a kadai (deep frying pan), add oil to fry. 
  • Add a spoon of this oil to the batter prepared and mix.
  • Dip the vadas in this batter, and add them to the heated oil. Fry them till golden brown and place them aside.
To make the Chutneys:

  Green Chutney: Just grind all ingredients and place it in a bowl.

  Red Chutney: 
  
     The way I prepared: Slightly roast the sesame seeds, and grind all ingredients to a  smooth mix. If you like, add a bit of lemon juice and mix well.

     Typical Method: Roast coconut to a deep brown color. Roast the sesame seeds to light brown color. You can roast the garlic and red chili powder as well. Cool them and grind them to a mix (with very less or no water).

To make the Vada Pav:
  • I slit a pav (a bun) into two and slightly roasted them on a tava (this is optional; typically it is had raw)
  • Apply the Chutneys you have made (green, red etc), and place a Vada / Tikki in between two loaves and serve it hot with green chilies.
Note: Green Chilies can also be slightly sauteed in oil and some salt and mustard seed powder can be sprinkled on it before serving. 

Serve it hot with the accompanying green chilies and chutneys, with a hot cup of tea or any of your favorite drink!

Wednesday, May 14, 2014

Momos (Dumplings) with Hot Chutney

Momos, alias dumplings, is a native, traditional Nepali dish but that slowly spread across to places such as Tibet, Bhutan etc mainly the North Eastern parts of India. But now, its famous in many places of India and its slowly catching up in South India as well.

It's similar to the Modhaks that we make during Ganesh Chaturti festival. The difference is mainly in the ingredients and stuffing while both can be either steamed or fried.


Vegetable Momos with Hot Sauce: My First Attempt
Ingredients:

For Momos Outer Cover
  • Flour    : 1 cup (200 gms or so)
  • Oil       : 1 tspn
  • Salt      : to taste 
  • Water  : to knead
For Stuffing -- You can have your own choice of vegetables
  • Cabbage             : 1/2 - 1 cup shredded finely
  • Carrot                 : 1 shredded finely (I had to skip since I didn't have it handy)
  • Spring Onions     : 2 full (Instead I used half regular onion)
  • Coriander leaves : a handful (Instead of spring onion leaves)
  • Shimla Mirch      : 1/2 piece (if its a big one) shredded finely 
  • Potato                : Boiled and mashed (optional, typically not used)
  • Garlic                 : 1-2 pods finely chopped
  • Ginger                : 1" finely chopped
  • Pepper Powder  : 1tspn
  • Soya Sauce        : 1 tspn
  • Sugar                 : 1/2 tspn (optional)
  • Salt                    : To taste
  • Oil                     : To fry the vegetables
Method:

To make the momos cover / wrapper:
  1. In a bowl, mix flour, salt and knead it with water to make it smooth. Ensure it has the right consistency to roll out. End of it mix the oil and knead it smoothly for another couple of minutes.
  2. Cover the dough with a damp cloth (mulin kinds) and leave it to rest for 15-20 mts at least.
To make the Stuffing:

Method 1:
  1. In a kadai, add a spoon of oil. As it heats up, add garlic and onion. Stir it in moderate flame for a minute. 
  2. To this add all vegetables and sugar (if rqd) and stir again in moderate flame. Then, add salt, soya sauce, pepper, and keep stirring. 
  3. Finally, add the chopped coriander leaves (preferred is spring onion leaves). Stir for 2 seconds and remove from fire. Allow it to cool
Method 2:
  1. In this method, we don't fry the vegetables. We just mix all ingredients mentioned under "Ingredients for Stuffing" and keep them ready. You can skip Soya Sauce if rqd.
To make the vegetable momos:


Electric Cooker Steamer Vessel

  1. Make small balls of the dough like you will for puris. Roll it out to thin sheets. (We can make a big roti size and using any sharp circle shaped lid can cut it into small puris). Ensure the final sheets are thin.
  2. Place a spoon of the stuffing at the center of each sheet.
  3. Fold them to make the momos. It's similar to making the fleets of a saree. I followed a couple of videos on youtube to make the folds. You can refer to : https://www.youtube.com/watch?v=Zh5_DuuxHC0. Alternatively, you can fold it like the modhaks as well.
  4. In a steamer or electric cooker or pressure cooker, fill water and allow it to boil.  
  5. Apply some oil to the steaming plate or idli plates and place the momos such that they don't stick to each other. If you are using the electric cooker, then place these plates within the steamer vessel like the one shown to the right here.
  6. When the water boils, place this steaming plate and steam it for 10-15 mts (for Method 2 stuffing) and 10 mts (for Method 1 stuffing). 
  7. The right consistency will be the momos will appear transparent.
To make the momos sauce - Hot Tomato Garlic Chutney

Ingredients:
  1. Tomatoes                 : 4 small (diced)
  2. Dried Red Chillies    : 5-6 (as hot as you want the sauce to be)
  3. Garlic                       : 2 -3 cloves 
  4. Ginger                      : 1" (optional)
  5. Vinegar / Lime Juice : 1 tbsp
  6. Salt                          : To Taste
  7. Sugar                       : 1 tspn
Method:
  1. Soak the red chillies in water for some time (30 mts at least)
  2. In a pan, saute with just a few drops of oil the diced tomatoes, ginger, garlic (optional step)
  3. In a mixer, add the red chillies, ginger, garlic, lime juice / vinegar and grind it well. After a couple of rounds, add the tomatoes and grind. Ensure the seeds of the chillies are well ground. [Alternatively, some grate the tomatoes, grind the remaining contents and mix them in the end]
Note: My Learning
  • For Momos Stuffing, I used Method 1 but I feel Method 2 will give you more authentic momos because all ingredients will only be steamed. In Method 1, it becomes a mix of fry and steam.
  • For the sauce, I followed another method of soaking the chillies in vinegar. But my suggestion is not to do that because then vinegar's stench and taste overrules the rest. My bad :(
  • Momos cover / wrapper should be as thin as possible else it won't cook well.
Momos are best served hot:) Relish it! 

Tuesday, May 6, 2014

Crispy Puff alias Pastry

One of the famous, preferred and favorite snacks in many parts of India is the hot pastry alias puff with different stuffing including vegetables or non veg choices. A hot puff along with a hot cup of tea is a bliss especially during rainy and / or winter season :)

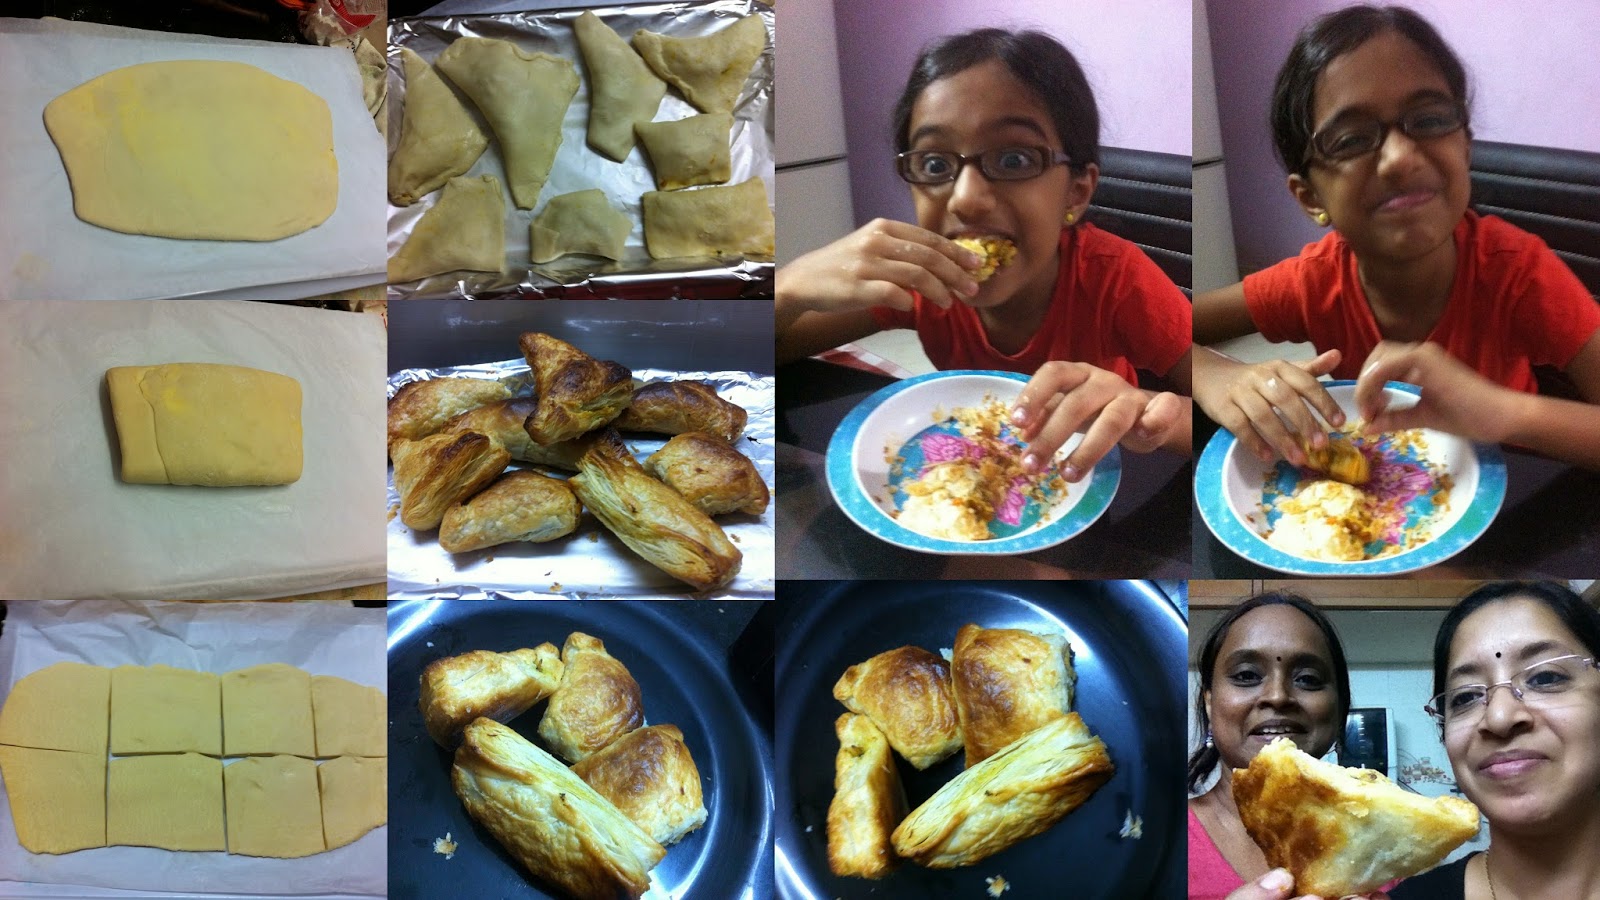
Me and Sangee (my partner in all my kitchen attempts) wanted to try and make these crispy puffs in our kitchen using the OTG. It's been on our "To Experiment" list for long which we tested some time ago. The results, I would say, was a hands-down win-win because our darling little princess loved it and so did we.

We zeroed in on 'Vah Chef's' recipe (IPR of his) when we decided to test this out. Believe me, his video is definitely a novice-guide. You just need to follow him step by step to get yummy puffs. So, am not going to repeat the procedure here but share the video of his which we followed with little customization of ours:

https://www.youtube.com/watch?v=x9sE0cisM58 -- Copy Paste this link to view the video.
[Thanks Chef, it was really easy to follow and puffs were yummy / tummy.]

Be prepared to put in a bit of effort because it requires that to make these puff sheets. Once the sheets are ready, you can go ahead and make the pastry with a stuffing of your choice. We tried Vegetarian stuffing using readily available vegetables such as potatoes etc.

Monday, April 21, 2014

Gol Gappa Aka Pani Puri

Gol Gappa Aka Pani Puri is a simple, lip-smacking snack popular in places such as Delhi, Mumbai, et all... It is one of the most-desired chaat items for many Indians, as once you taste it, for sure, you would love to have at least 4-5 in one go. It is a balanced mix of all tastes including spice, tangy, sweet, and salt. I have relished them in the streets of Delhi... Down in Chennai, this is just gaining prominence so much room for improvement :) Over here, Gangotri is one outlet serves a decent quality of gol gappas.

Finally, made up my mind to try my hand in making this all time snack. One of my partners in such crimes Sangee joined me readily! We managed to bring on a satisfying & happy smile on our lovelies' face :))


Ingredients:
  • To make the puris:
    • Suji (Rava)         : 1/2 cup
    • Flour (Maida)     : 1/2 tbsp
    • Soda Water        : 3 tbsp
    • Baking Soda       : 1/2 tsp (optional)
    • Salt                     : To Taste
    • Oil                      : To Fry
  • To make the Pani (Green Pani):
    • Pudhina (Chopped)   : 1 1/2 cup
    • Coriander (Chopped): 1- 2 tbsp
    • Imli Water                 : 1/3 cup
    • Ginger (Adrak)          : 2"
    • Green Chillies            :6-8 (medium * as spicy you need the water to be)
    • Coriander powder     : 1 pinch (optional)
    • Jeera Powder            : 1 tspn (freshly ground will have a nice flavor)
    • Black Salt                 : 1.5 tspn
    • Salt                           : To Taste
  • For the Filling:
    • Potato (Boiled and Smashed) : 4-5 medium
    • Boondi                                  : Fried (Get them in market & is optional)
    • Sev                                        : Optional
    • White Channa / Sprouts (Boiled) and any other of your choice
Method:
  • To make puris:
    • Mix Suji, flour, salt, baking soda and make it to a smooth dough using the soda water and regular water. (Oil not required to make this dough)
    • Cover it by a wet muslin cloth (or any thin white wet cloth) and leave it to rest for 15 mts. The dough will raise a bit due to the soda (very slightly)
    • Make small and thin puris. Place these puris first under a damp cloth for 5 mts before frying them. (Thinness of the puris will ensure the crispiness else the flour won't get cooked easily, making the puris soft rather than crispy)
    • Ensure the oil is in the right heat before you add the puris to fry. Using a cooking slotted ladle or spoon, press the puris to ensure they puff up both sides. Take them when golden brown (cook it both sides till they puff up to the shape of the gol gappa; if they flatten then u can eat them as puris for other chaat items).
    • Remove, drain, allow them to cool. As soon as they cool down, store them in an air-tight container.
  • To make pani:
    • Grind all ingredients (specified under 'To make pani') except for salt. After ground smoothly, sieve it into a bowl of about 500 gms to 1 lt of water (as you want the quantity & also ensure it doesn't dilute the spice)
    • Add salt & mix well. 
    • Serve it chilled.
  • To make the Filling : Boil the potatoes and smash it well. You can individually add all fillers you decide on while serving
  • To make the sweet / tangy chutney: Refer to "Dates & Raisin Chutney". You can take a few spoons of this chutney and dilute it a bit to be used as the gol gappa mix
To Serve / Eat: Take a puri, slightly tap and make a hole in the center, add all fillers, a spoon of pani & a spoon of the chutney and just gulp it... As you develop the taste you may end up having countless numbers as well :))

Wednesday, October 23, 2013

Gujiya : Sweet Dumplings, North Indian Style

Gujiya is a widely consumed snack from North India, most predominantly made during 'Holi' celebrations. But this is such a simple yet delicious dish & so easy to make that we can have it any time! I have always wanted to try these @ home and finally here I am!

I had last posted on Dumplings : Indian style. Gujiya is exactly similar to that but for the base ingredients used. Let me share what makes a Gujiya and allow you to try it on your own :)


Ingredients:

For the cover
  • Refined Flour (Maida) : 1 cup
  • Sooji (Semolina / Rav): 2-3 tspn 
  • Ghee:  3 tbspn
  • Oil:  For Frying
For the stuffing
  • Khoya (Mawa) : 2/3 cup grated  (Click khyoa @ home recipe)
  • Sugar : 1 -1.5 cups (powdered)
  • Raisins : 15-20
  • Cashew : 15
  • Almond: 10
  • Any other dry fruits of your preference like Fig
  • Cardomom Powder: 1/4 tspn
  • Coconut: 2 tbspn (Desiccated or if fresh, grate & fry it till brown)
  • Water: 1/4 cup (cold water)
Home-made Khoya (Mawa)

Method:

To make the dough for the Cover: Sift the flour and add it in a vessel. To this, add ghee and with fingertips mix it to make it like breadcrumbs


To this mix, add the water and knead it to a smooth dough (don't beat it much). Cover it with a damp cloth and leave it aside for a while.


To make the stuffing: 
  1. If you are using fresh grated coconut (instead of desiccated), then first fry them to golden brown and keep aside.
  2. In a non-stick pan, add the khoya (mawa). Saute it for 2-3 mts and remove it from fire. To this, add all dry fruits and coconut. Mix it and then add the powdered sugar. Mix it to make the final stuffing.
To make gujiya:
  • Make small balls of the dough. 
  • Spread each one to a poori-size. After you make 4-5 of these start filling them and frying. (Don't make all of them and allow them to dry in the air)
  • Place the stuffing on one side of the poori. Moisten the edges of the poori with water. 
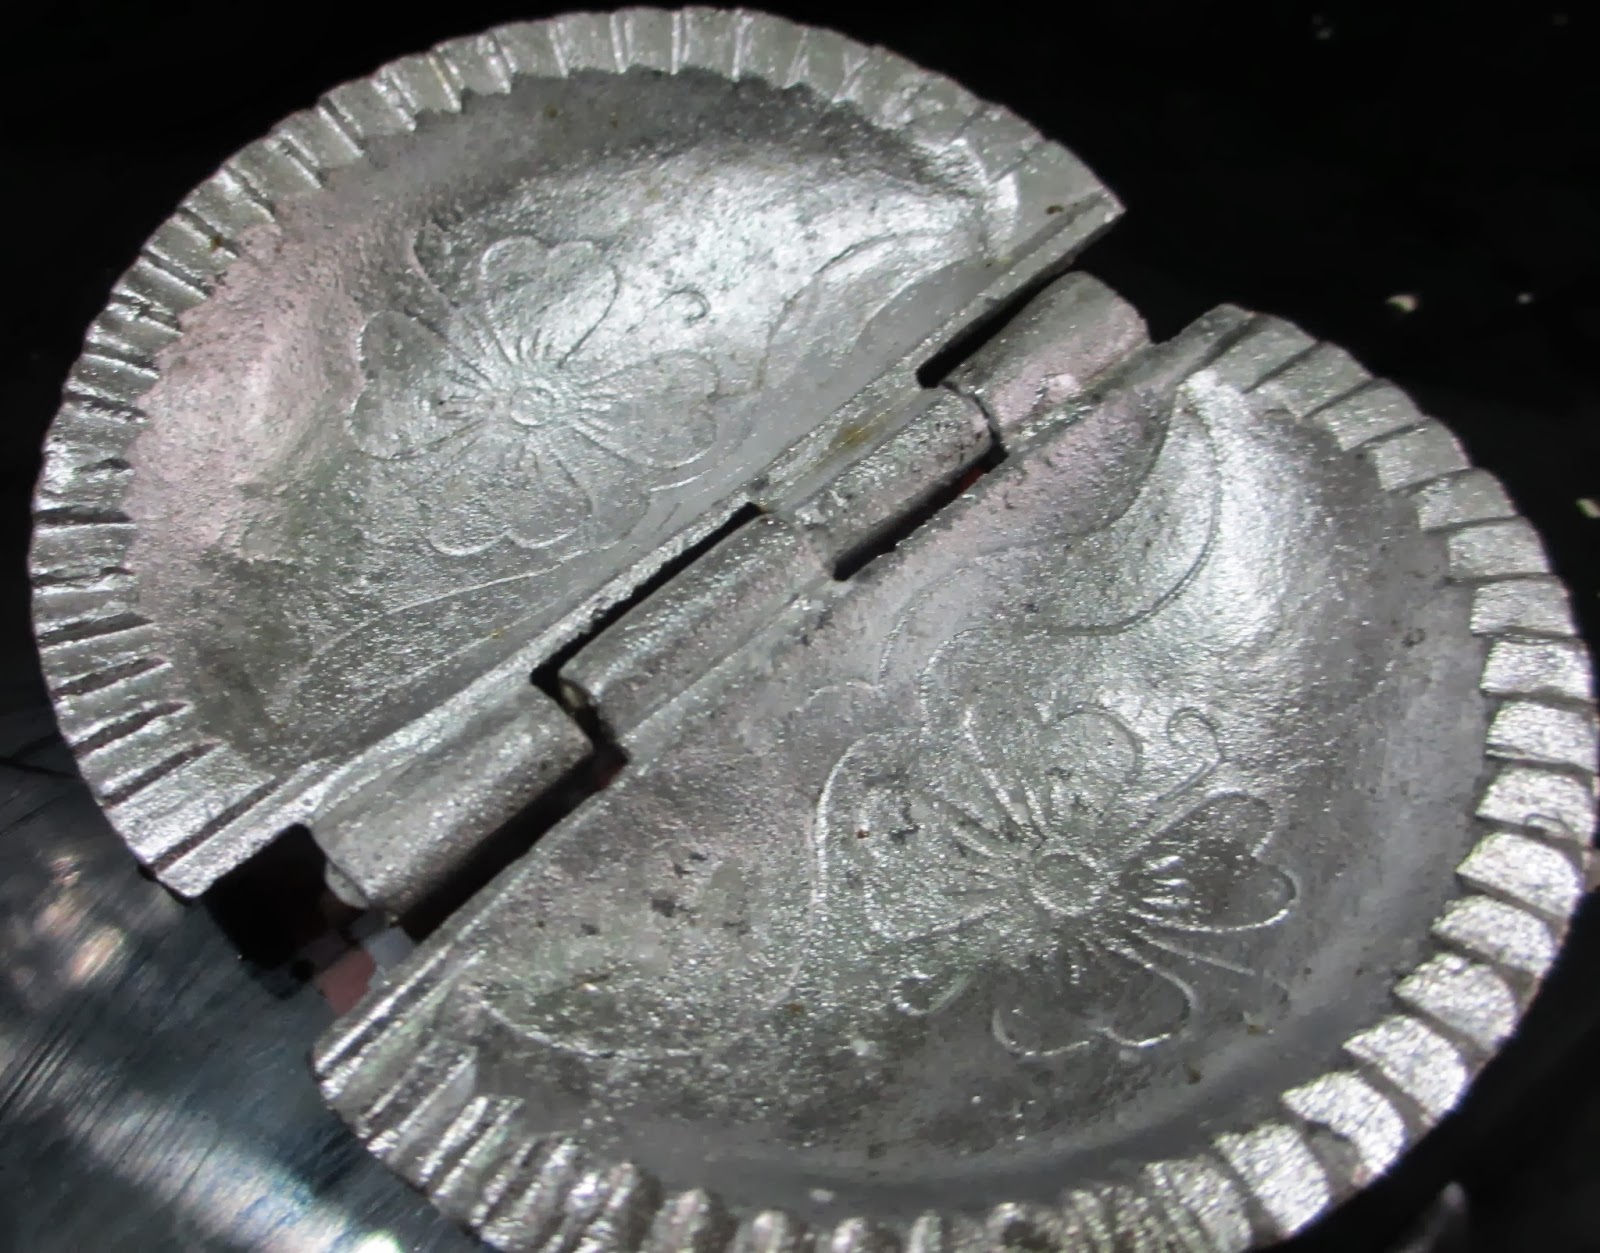
  • Now, cover the stuffing with the remaining half of the poori to a half-moon shaped gujiya (Alternatively, you can use the mould available in market). Ensure the edges are firmly closed


  • In a deep frying pan, heat oil. Ensure the oil is not very hot. Should be medium hot to fry gujiyas. Fry each till golden brown.
  • Place them on a plate with tissues because they are deep fried in oil. Cool them & store them in air-tight container.
[Thanks to @Chef Sanjeev Kapoor for this recipe]

Tuesday, October 15, 2013

Kuzhi Paniyaram : A spicy snack

Often when we get bogged down by the regular snacks or on a rainy evening or just for a want of change, we feel the need to try a different snack - if something hot & spicy is what you are looking for and that too in a jiffy, here is one such lip smacking dish : the famous from granny's kitchen, kuzhi paniyaram : the spicy variety

We have a lots to thank our grannys' for their tips & tricks, which are endless. The main ingredient to make the paniyaram is just the left over & a bit sour idli / dosa flour :)


Preparation Time: 15-20 mts

Ingredients:

Idly / Dosa flour : Left over & a bit sour (else you can add a bit of sour curd) -- 2 cups 
Green Chillies:     4-5 chopped (As spicy as you like)
Black Pepper:      4-5 pepper (If you want to have a bit of pepper flavor; you can reduce the chillies if you add more of pepper)
Onion           :      1 Medium chopped finely
Ginger:                 1/2 " fine chopped
Coconut       :       A few pieces (finely cut into small pieces - I haven't added in this picture shown)
Salt              :       To taste (Only a spoon or so more to make for the sourness & added ingredients)
Curry Leaves / Coriander : A few (if rqd)
Oil :                      To Fry

Method:
  1. In a bowl, mix the flour (sour curd if the flour is not sour), and all other ingredients mentioned above. 
  2. Ensure consistency is semi-solid and not very watery
  3. Keep the Paniyaram pan (best suited are the non-stick pans available in the market) on a medium fire
  4. Add 1/2 a tspn of oil (lesser from second round)
  5. As the oil heats up slightly, pour a spoon of flour each (should not be overflowing)
  6. Close the pan and allow it to cook for 2-3 mts (max) - till they turn golden brown
  7. Using a knife or a bread knife turn it around & allow it to cook till golden brown
  8. Remove from fire & serve it hot with some interesting side dish : Chutneys / Sambhar 
    Tip: Alternatively, some do the following:
  • In a tava, add 2 spoons of oil and add mustard. As it sputters, add the chillie, ginger, and onions. Cook till the onion turn pinkish and then add the coconut and finally the garnishing leaves.
  • Remove from fire and add it to the flour & follow the remaining steps to prepare the paniyaram.

Chutney:

Onion & Tomato:
Onion: 2 medium
Tomatoes: 3-4 medium
Tamarind : A small peas size
Garlic:    4-5 pods
Red Chillie : 4-5 (splicy ones or you can also add red chillie powder)
Salt:     To taste

Fry each of the above in a spoon of oil separately and cool them before grinding the chutney (with salt). You can garnish it with curry leaves & coriander leaves; season it with spluttered mustard.

Coconut:

Coconut: 1 cup (grated or pieces that can be ground)
Fried gram : 1 tbspn (Potu kadalai)
Green Chillies: 3-4 (As spicy as you like)
Ginger:  1/2 "
Salt:     To taste

Grind them fresh (no fry rqd) with salt. Season it with spluttered mustard & udadh dhal and garnish with curry leaves.

Tuesday, September 10, 2013

Dumplings : Indian Style

Dumpling is a dish similar to the well-known Chinese dumplings or momos. In India, this is a dish made of primarily the Rice flour and varied styles such as sweet (alias Modaks), salted, fried etc. Its considered to be the favorite dish of Lord Ganesha and is made to celebrate his birthday (Ganesh Chaturthi). It is famously known as "Kozhukatai" in South India.

While I've tried making the sweet kozhukatai also known as Modak, this year I also tried to make the salted kozhukatai. Good start with all liking what they got to taste! This is joined effort of mine & aunt (sangee's mom) based on recipes read on the web :)


Sweet Kozhukatai / Modaks
Salt Kozhukatai 
Kozhukatai Flour 

Ingredients:
  1. Rice Powder: 3 cups (for both sweet & Salt kozhukatai) - You can buy the readily available rice powder or soak raw rice in water for about an hour, drain, ensure all water is absorbed via a cloth, and powder it in a mixer. Seive it to get the nice powder.
  2. Oil : Preferably Coconut oil - 2 tspn
  3. Salt : 1/4 tspn
  4. Water: 2.5 cups (same measuring cup as the one used for the powder)
  5. Milk : 0.5 cup
Preparation:
  1. In a pan, add water and heat it along with salt, oil, & milk.
  2. As the water starts to boil, add the rice powder slowly & stirring constantly
  3. As soon as the powder is mixed with the water, remove it from fire
  4. Mix it with hand to make it into a smooth dough. Sprinkle water and a bit of oil to mix it smoothly. If its too watery, add more of rice powder.
  5. Leave the dough covered with a cloth for a few minutes
Sweet Kozhukatai 

Stuffing Ingredients:
  1. Coconut : grated 1 cup
  2. Jaggery : grated 3/4 cup 
  3. Cardomom powder : 1/4 tspn (2-3 pieces powdered)
  4. Oil or Ghee : 2 tspn
  5. Water : 1/2 cup or lesser to just dissolve the jaggery
Preparation:
  1. In a pan, add water and the jaggery
  2. When it dissolves completely, filter it to remove any sand or other particles
  3. Add it back to the pan and allow it to start boiling
  4. To this add the coconut, ghee, and cardomom powder continuosly stirring it
  5. When it reaches a consistency like a ball with not sticking on to the pan, remove from fire
Salt Kozhukatai 

Stuffing Ingredients:
  1. Uradh dhal (Uzhutamparupu): 1/2 cup soaked in water for 2-3 hours
  2. Green Chillies: 2-3 (based on the spice level)
  3. Salt : per taste
  4. Curry leaves: 4-5 pieces
  5. Oil : 2 tspn
  6. Mustard seeds: 1/2 tspn
  7. Coconut (optional) : 1-2 tspn
  8. Asafotedia (hing) : a pinch
Preparation:
  1. Grind the soaked & drained dhal with green chillie, salt & curry leaves. Ensure its coarse & don't use much water. Sprinkle water (if rqd) and grind
  2. Take this mix, make it to into medium-sized balls & steam it (you can use idli plates by applying a bit of oil) - for 5-7 mts
  3. Remove & break the cooked balls
  4. In a pan, add oil. When its hot, add the mustard seeds. As they splutter, add this steamed mix along with hing and coconut.
  5. Cook them for 2-3 mts & remove from fire.
Making the Kozhukatai (both sweet / salt)
  1. Take a lemon-sized dough in hand, apply a bit of oil, and make it into a cup shape (shd be thin on the sides & deep in the middle)
  2. At the center, place a lemon-sized sweet / salt stuffing
  3. Close the cup into the desired shape - could be a round or horizontal or any other shape you can think of. Ensure the stuffing is fully covered & there is a balance between the dough & stuffing proportion.
  4. Once all made, take the idli plates, apply a bit of oil / ghee in each plate & place these kozhukatais. 
  5. Steam them for 5-7 mts. When done they appear transparent (you can just touch water and touch the kozhukatais by the fingers. If its not sticky its done)
  6. Serve them hot
We get those kozhukatai makers (shown below) which will ease your job. Just ensure you apply oil before placing the dough inside it.


Enjoy delicious & healthy kozhukatais! These make for a good evening snack as well. These are 2 basic varieties. Soon planning to try on some more & will share. Till then, eat healthy & enjoy life!

Thursday, April 25, 2013

Chivda : A quick evening snack

At the onset of kids' vacations or even during daily tea time, we feel the need for some interesting snacks. While the market these days are flooded with varieties of snacks, at times you might feel the need or like to have something home-made. Ofcourse, none so complex to prepare but something that you can put together in a few minutes.

One such irresistible snack is the famous 'Chivda'. It has variations to it and can be made based on your creativity. This is a healthy and interesting snack which might attract the kids as well.

Here am sharing a very simple 'chivda' made out of puffed rice and flattened rice (poha).

 Ingredients:
  
1. Flattened Rice (white / red) : 2 cups
2. Puffed Rice (pori) : 2 cups
3. Peanuts / Ground nuts(raw or fried) : 1/4 - 1/2 cup (remove the skin)
4. Roasted Gram Dhal : 1/4 cup (or lesser as preferred)
5. Green Chillies : 2-4 slit vertically (as per your spice preference)
6. Curry leaves : 6-10 (as per your taste)
7. Dry Fruits: Add desired dry fruits in balance quantity
8. Turmeric powder : 2 pinch
9. Salt : Per Taste
10. Mustard seeds: Optional (just a tspn)
11. Oil : 2 tbspn (doesn't require much oil as per the quantity you are making)
12. Asafoetida: a pinch
13. Dried coconut : Thin slices - 5-10 numbers

Method:

Chivda is just a mix of all the above ingredients fried till crunchy/crispy and mixed together with salt.
  1. In a kadai (cooking vessel), add oil. When the oil is little warm, add mustard seeds. 
  2. As they crackle, add curry leaves, chillies, turmeric powder. Fry them till they become crispy. 
  3. Add the roasted gram dhal and saute it for a few minutes
  4. Add the flattened rice and fry them till they become crispy. 
  5. Add the puffed rice and saute for a minute
  6. Finally, add the fried ground nuts [If raw ground nuts, then fry them first with some salt. If you are using the readily fried/salted peanuts then you can use them as is (ensure they are crunchy). Remove the skin once cooled. Then, add it to the other fried ingredients in the kadai]
  7. Fry the coconut pieces and add them to the kadai
  8. Add the dry fruits you like (I added only dried grapes)
  9. Remove from fire and sprinkle salt. Mix well
  10. Remove it to a broader plate or bowl and allow it to cool for sometime
  11. Place it in a air-tight container
Note:
  1. You can make chivda out of Oats / Sabudhana
  2. Use Red Chillies as an alternative for Green chillies
  3. Next time, I plan to sprinkle some Chaat masala as well :)
  4. Ensure its cooled completely before you store else it might become soggy
Yummy and crunchy tea-time snack is now ready. Try & share your feedback and more suggestions. Happy snacking :)